Public: User Documentation : Creating, uploading and using NetLogo models
This page last changed on Jun 04, 2008 by ddamelin.
Creating, uploading and using NetLogo models
Creating and saving a model
- Download NetLogo from the following site: NetLogo homepage
- Open NetLogo and build a new model or select and modify a model from the Models Library or the Community Models. This site has tutorials, code examples, and a User Manual under Help.
- Save the model to your computer by going to the File menu and selecting either Save or Save As. Give your new model a name.
Uploading the model
Now you will upload your model to the Internet.
- Go to the NetLogo Community Models upload page.
- Enter the appropriate information in the fields of the window.
- Use the "browse" button to find your model on your computer.
- Press "upload". Your model will be uploaded onto the NetLogo Community Models website. Your model will be processed promptly, usually within a day.
- When you return to the Community Models website, you will find your model listed. Click on your model name.
- Then right-click (Mac: ctrl-click) on "run modelname in your browser". This will copy the URL that refers to your model.
Creating a DIY model
Now you are going to create a new DIY model that uses the NetLogo model you just created.
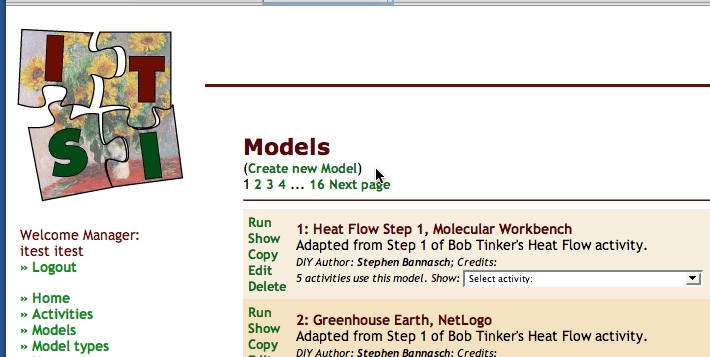
- Go to http://itsidiy.concord.org, and select Models from the menu of the left.
- Select "New model" from the top of the list of models.
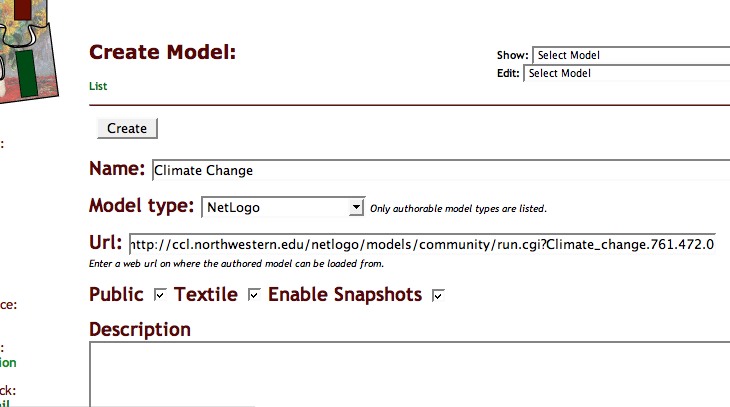
- Give your model a name and select "NetLogo" as the model type.


- Paste in the URL of your model that you saved from the NetLogo Community Models page (above).
- Fill in the rest of the information as necessary. All the fields are optional.
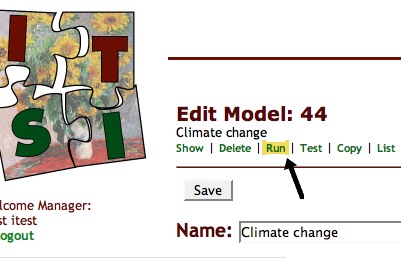
- Hit the Save button at the top or bottom of the screen.
- Now test that the model works by clicking on Run at the top of the model's page.

Using the model in an activity
Finally, we are going to create a new activity which uses the model you created.
- Click on the Activities link from the menu on the left.
- Click Create a New Activity from the top of the list.
- Give your new activity a name, an introduction, and any other content you would like.
- Scroll down to the first Data Collection section. Check the box next to Model, and then find and select your new model from the pull-down list (it will probably be near the bottom).
- Click the Save button at the top or bottom of the page.
- Click the Run link at the top of the page.
You should now see your model running in your new activity!